
You’ve spent hours perfecting your latest video. The cuts are sharp, the effects are dazzling, and the timing is perfect.
You hit the export button, buzzing with excitement, only to find the final video is… blurry? Pixelated? It’s a frustrating moment that can make you want to throw your phone or computer out the window.
Don’t worry, you’re not alone. This is a common hiccup for many CapCut users. The good news? Low-quality exports are usually not because CapCut can’t handle HD or 4K. It’s often a small setting, hardware limitation, or workflow mistake that’s holding your video back.
Let’s break down why CapCut exports in low quality and the exact fixes to get crisp, professional-looking videos every time.
This guide will walk you through the most common reasons your CapCut exports look bad and show you exactly how to fix them for crystal-clear results every time.
1. Mismatched Export Settings
More often than not, the reason your video quality drops is because the export settings don’t match the quality of your original footage. Think of it like trying to print a massive poster from a tiny thumbnail image the quality just won’t hold up.
Here’s the golden rule: Your export resolution and frame rate should match your source footage.
If you record a video in 1080p at 30 frames per second (fps), exporting it in 4K at 60 fps won’t magically add detail. In fact, it can often make things worse, leading to a blurry or glitchy result.
The Fix:
- Check Your Original Video’s Properties: Before you even start editing, find your original video file on your device. Right-click it (on a PC) or find the “details” or “info” option to see its resolution (e.g., 1920×1080 for 1080p) and frame rate.
- Match in CapCut: When you’re ready to export, tap the resolution option at the top of the screen. Set the resolution and frame rate to match your original file. For most social media platforms like TikTok and Instagram, 1080p and 30fps are the perfect balance of quality and file size.
2. Mastering CapCut’s Export Settings
Beyond resolution and frame rate, a few other settings can make a huge difference.
Let’s open the hood and fine-tune your export for the best possible quality.
On CapCut PC and Mobile:
- Bitrate: This setting controls the amount of data in your video. A higher bitrate generally means better quality but also a larger file size. CapCut often has a “Recommended” setting which works well, but if you’re still seeing issues, you can try manually setting it a bit higher.
- Codec: You’ll likely see options like H.264 and HEVC (H.265). H.264 is the most widely compatible format and is perfect for social media. HEVC is a newer option that offers better compression (smaller file size for the same quality), but may not be compatible with all devices. Sticking with H.264 is usually the safest bet.
- Smart HDR: This feature can sometimes cause color and quality issues on platforms that don’t support it. Try turning Smart HDR off to see if it improves your export.
3. Performance Limitations (Device or Browser)
On low-end PCs or phones, CapCut might lower export quality to prevent crashes.
In CapCut Online (browser version), slow internet can also force compressed exports.
4. Other Common Issues and Their Simple Fixes
If your settings are correct but the problem persists, it’s time to check a few other things:
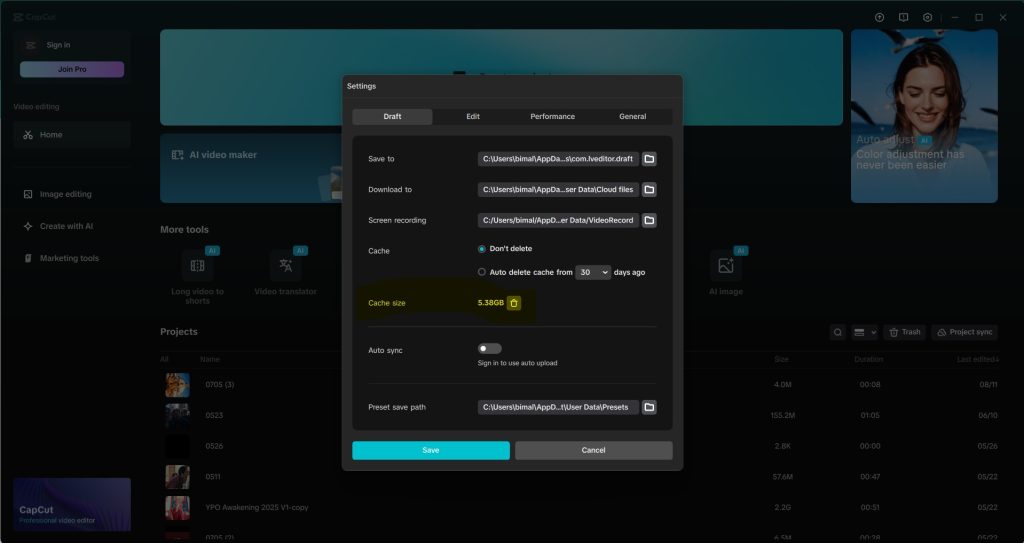
- Clear the Cache: Over time, CapCut can accumulate a lot of temporary files that can cause glitches.
- On PC: Click the settings icon, go to “Settings,” and you’ll find an option to clear the cache.
On Mobile: In your phone’s settings, find the CapCut app and clear the cache from there.
- Free Up Storage Space: Video editing requires a good amount of free space on your device. If your storage is nearly full, CapCut may struggle to export properly. Try deleting old files or apps you no longer need.
- Update the App: Make sure you’re using the latest version of CapCut. Developers are constantly releasing updates with bug fixes that can solve export problems.
- Too Many Effects: While CapCut’s effects are fun, going overboard can sometimes reduce video quality. If you’re using a lot of heavy effects, try a test export without them to see if they are the cause.
How to Fix Low-Quality Exports in CapCut
1. Manually Set Export Quality
Before hitting “Export”:
- Resolution: Choose 1080p or 4K (if your footage supports it)
- Frame Rate: Select 60fps for smoother motion, 30fps for standard content
- Bitrate (if available): Higher bitrate = better quality (but larger file size)
2. Use High-Quality Source Footage
- Record videos in at least 1080p on your camera or phone.
- Avoid zooming in excessively during editing — it reduces sharpness.
- Keep your project settings at the highest resolution from the start.
3. Update CapCut & Clear Cache
- Go to settings → clear cache → restart the app.
- Check for updates in Google Play Store, App Store, or the official CapCut site.
- For PC users, reinstalling often fixes export glitches.
4. Avoid Multiple Renders
If you edit, export, and then re-import the same video to add effects, you’re re-compressing it — which lowers quality.
Instead, do all edits in one project and export only once.
5. Beat Social Media Compression
- Export at the recommended resolution & frame rate for the platform.
(Example: TikTok prefers 1080×1920, 30fps; YouTube can handle 4K) - Add a slight sharpen filter in CapCut before export.
- Use platform-specific upload settings where possible.
When All Else Fails…
If none of the above works:
- Try CapCut Online or the PC app instead of mobile.
- Test another editor (just to confirm it’s not a hardware issue).
- Contact CapCut support with your project file — sometimes it’s a known bug.
Final Thoughts
CapCut is fully capable of exporting in full HD and even 4K but it won’t do it by default if your footage, settings, or device limit the output.
By tweaking export settings, using quality source clips, and avoiding unnecessary re-compression, you can get sharp, professional results every time.
More related to CapCut:
How to Use Green Screen Effects in CapCut PC
How to make money using CapCut
Fix: Video Templates not showing on CapCut PC